Gelato: How to Create Perfect Gelato at Home

Introduction
Gelato, Italy’s velvety dessert, stands apart from traditional ice cream with its rich texture and intense flavors. This beloved treat not only delights taste buds but also holds a cherished place in Italian culture. Explore the unique world of gelato and its enduring popularity across Italy.
The History of Gelato
A Sweet Journey Through Time
Gelato didn’t just appear out of thin air; it has a rich history that dates back centuries in Italy. This creamy delight first stirred up attention during the Renaissance, an era known for its innovation and artistry.
From Florence to the World
The story goes that Bernardo Buontalenti, a Florentine architect, introduced gelato to the court of Caterina de’ Medici in the 16th century. He created a frozen mixture of milk, honey, and egg yolk, captivating everyone who tasted it. This dessert quickly became a sensation among the Italian aristocracy.
Evolving Flavors and Techniques
Over the years, the technique of making gelato evolved remarkably. Initially, it was made using mountain snow and ice to chill the mixture, a method quite different from the modern gelato machines we see today. As the dessert’s popularity soared, so did the variety of flavors. From classic fruits to innovative combinations like tiramisu and hazelnuts, gelato makers have never stopped experimenting.
Gelato Today
Today, gelato remains a staple of Italian culture, cherished not just for its smooth texture and rich flavors but for its joyful presence in daily life. Whether it’s a quick treat during a walk-through piazza or a sweet finale to a family meal, gelato is a symbol of Italian craftsmanship and culinary delight.
This sweet journey shows that gelato is more than just a dessert; it’s a piece of history, continuously churned to perfection. Dive into the next chapter where we’ll discover how gelato stands apart from its cousin, ice cream.
Essential Ingredients for Making Gelato
Crafting the Creamy Classic
When it comes to making mouthwatering gelato, the secret lies in using a few key ingredients: milk, cream, sugar, and egg yolks. Let’s dive into what makes these components so crucial and how they blend to create gelato’s unforgettable texture.
The Core of Gelato: Milk and Cream
Milk is the backbone of gelato, providing a smooth base that carries all the flavors. Cream, on the other hand, adds richness that makes gelato famously creamy and luscious. The balance between milk and cream is essential; too much cream can make the gelato heavy, while too little might not give it the creamy consistency we love.
Sweetness and Structure: Sugar and Egg Yolks
Sugar does more than just sweeten the pot—it also plays a critical role in lowering the freezing point, which contributes to gelato’s soft texture. Egg yolks, a less common but traditional ingredient, act as emulsifiers. They help blend the fat and water smoothly together, ensuring that every scoop is silky and cohesive.
Quality and Proportions Matter
The quality of each ingredient significantly impacts the final product. Fresh, high-quality milk and cream will impart a cleaner, richer taste, and organic sugar can enhance the overall flavor profile. The ratios of these ingredients are just as important; they determine the texture and richness of the gelato. Striking the right balance is what separates good gelato from great gelato.
By understanding these essentials, you’re well on your way to making gelato that might just transport you to the streets of Italy with every bite. Up next, let’s compare gelato to its frozen cousin, ice cream, and discover what sets them apart!
Gelato vs. Ice Cream: What’s the Difference?
Understanding the Delightful Distinctions
Ever wondered what makes gelato different from ice cream? Although both are delicious frozen treats, they differ significantly in ingredients, texture, and how they are served. Let’s scoop into these differences to appreciate each one better.
Ingredients and Texture
Gelato is made with a higher proportion of milk to cream, whereas ice cream often contains more cream, making it higher in fat. This difference in dairy content directly affects the texture; gelato is silkier and softer, while ice cream is typically firmer and creamier. The key is in the churn; gelato is churned at a slower rate, incorporating less air and leading to a denser texture that’s bursting with flavor.
Fat Content and Air Incorporation
Ice cream usually has a fat content of about 14-25%, contributed by the higher cream ratio. In contrast, gelato typically contains about 4-9% fat, thanks to its higher milk content. This not only makes gelato lighter but also enhances the flavors, as less fat coats the tongue, allowing the taste to shine through more vividly. Furthermore, while ice cream can have up to 50% air whipped into it, gelato might have only 20-30%, making it even more dense and flavorful.
Serving Temperature
Another notable difference is the serving temperature. Gelato is served at a slightly warmer temperature than ice cream, which keeps it soft and scoopable. This temperature difference ensures that gelato provides a uniquely smooth mouthfeel that’s hard to replicate in traditional ice cream.
By understanding these distinctions, we can better appreciate the artistry behind each creamy creation. Now, let’s explore the tools you’ll need to whip up your gelato at home in the next chapter.
Equipment Needed for Homemade Gelato
Gearing Up for Gelato Greatness
To whip up authentic homemade gelato, you’ll need a few key tools. Let’s explore the essential equipment to turn your kitchen into a gelato-making station and check out some of the best ice cream makers that can help you achieve that perfect consistency.
Essential Tools for Gelato Making
First, an ice cream maker is crucial. This device does the important work of churning your mixture at just the right speed to achieve gelato’s signature creamy texture without too much air. Next, a good spatula will help you mix ingredients thoroughly and scrape every delicious bit from the bowl. Don’t forget a reliable thermometer; it’s essential for monitoring the temperature of your mixture to ensure perfect pasteurization and freezing.
Top Ice Cream Makers for Home Use
When it comes to selecting an ice cream maker, look for models that offer precise temperature control and variable speeds suitable for gelato. Some of the best options include:
Cuisinart ICE-100: Renowned for its consistency and durability, perfect for gelato.
Breville BCI600XL: Offers pre-set functions for different desserts, including gelato, and ensures optimal texture.
Whynter ICM-200LS: A great choice for those who want a standalone machine that doesn’t require pre-freezing.
Investing in the right equipment will make your gelato-making process smoother and more enjoyable. With these tools in hand, you’re ready to dive into the craft of gelato making and bring a taste of Italy to your home. Next up, let’s learn how to whip up a basic yet irresistible vanilla gelato!
Basic Gelato Recipe (Vanilla)
Mastering the Classic Vanilla Gelato
Ready to make your vanilla gelato? This classic flavor is not only a crowd-pleaser but also the perfect base to master the fundamental techniques of gelato making. Let’s walk through the steps and share some tips to ensure your gelato comes out smooth and creamy.
Step-by-Step Vanilla Gelato Recipe
1. Ingredients: You’ll need 2 cups of whole milk, 1 cup of heavy cream, 3/4 cup of sugar, and 4 large egg yolks.
2. Mix Your Base: Combine milk and half the sugar in a saucepan and gently heat until the sugar dissolves and the milk is steaming.
3. Temper the Egg Yolks: Whisk the egg yolks with the remaining sugar until smooth. Gradually pour some of the hot milk into the yolks, stirring constantly, then pour the yolk mixture back into the pan.
4. Cook the Custard: Heat the mixture on low, stirring constantly, until it thickens enough to coat the back of a spoon.
5. Chill: Strain the custard through a fine-mesh sieve into a bowl, add the cream, and mix well. Chill the mixture in the refrigerator for at least 4 hours.
6. Churn: Pour the chilled mixture into your ice cream maker and churn according to the manufacturer’s instructions until it reaches a soft-serve consistency.
7. Freeze: Transfer the gelato to an airtight container and freeze until firm, about 2-4 hours.
Tips for Perfect Gelato
Ensure Freshness: Use the freshest eggs and dairy for the best flavor.
Keep It Cool: Always chill your custard before churning to help it freeze uniformly.
Don’t Rush the Churn: Allow the ice cream maker to run until the texture is just right; over or under-churning can affect the smoothness.
By following these steps and tips, you’ll craft a velvety vanilla gelato that could rival any Italian gelateria! Next, we’ll explore some creative flavors to elevate your homemade gelato game.
Creative Gelato Flavors to Try at Home

Unleashing Your Flavor Creativity with Gelato
Once you’ve mastered classic vanilla, why not dive into more adventurous gelato flavors? Pistachio, Stracciatella, and Lemon is just the beginning. Let’s explore how you can whip up these delightful varieties and even experiment to create your very own unique gelato flavors.
Making Pistachio, Stracciatella, and Lemon Gelato
1. Pistachio Gelato:
– Grind 1 cup of pistachios into a fine paste.
– Mix this paste into your basic gelato base before chilling.
– For an extra touch, chop some whole pistachios to add in during the last few minutes of churning.
2. Stracciatella Gelato:
– Prepare your vanilla gelato base and start the churning process.
– Melt 100g of dark chocolate.
– Drizzle the melted chocolate slowly into the churning gelato, creating fine shards of chocolate that swirl through the gelato.
3. Lemon Gelato:
– Add the zest of 3 lemons to your gelato base to infuse it with flavor.
– Mix in 1/4 cup of fresh lemon juice with the base before chilling for a refreshing citrusy taste.
Experimenting with Ingredients
– Start with the basic gelato base of milk, cream, sugar, and egg yolks.
– Think about flavors that excite you—fruits, nuts, chocolates, or even herbs.
– Add your chosen flavors to the base. For fruit flavors, consider creating a puree. For spices, infuse them into the milk as you heat it.
– Always taste as you go. The intensity of flavors can change once frozen.
By embracing these recipes and techniques, you not only expand your dessert repertoire but also transform your kitchen into a creative culinary workshop. Who knows? Your next batch could be a flavor sensation! Next up, let’s tackle some common pitfalls to avoid in gelato making.
Common Mistakes When Making Gelato and How to Avoid Them
Perfecting Your Gelato Game
Even the best of us can run into a little trouble when crafting gelato. From crystallization to improper storage, let’s pinpoint these common mishaps and learn how to sidestep them for the smoothest, creamiest gelato every time.
Troubleshooting Crystallization and Over-Churning
Crystallization: This happens when gelato becomes icy or grainy. To avoid this, ensure your sugar is completely dissolved during the cooking process. Also, a quick tip: using a small amount of alcohol, like vodka, in your base can help prevent ice crystals since alcohol doesn’t freeze.
Over-Churning: Over-churned gelato can turn buttery, and that’s not what we want! To prevent this, keep an eye on your gelato as it churns and stop the machine when it reaches the texture of soft-serve ice cream.
Storing Gelato Properly
Temperature is Key: Gelato is best stored at a slightly warmer temperature than ice cream. Aim to keep your freezer set to around -10°F (-23°C), which is ideal for maintaining that perfect gelato texture.
Airtight is Right: Always store gelato in an airtight container to keep out odors and prevent freezer burn. Pressing a piece of plastic wrap directly onto the surface of the gelato before sealing the container also helps to keep it fresh.
Short and Sweet: Gelato is best enjoyed within a few days of making it, as it doesn’t contain the preservatives found in commercial ice creams.
By keeping these tips in mind, you’ll be well on your way to making flawless gelato that could easily make an Italian chef proud. Ready to serve it up? Let’s dive into some creative presentation ideas next.
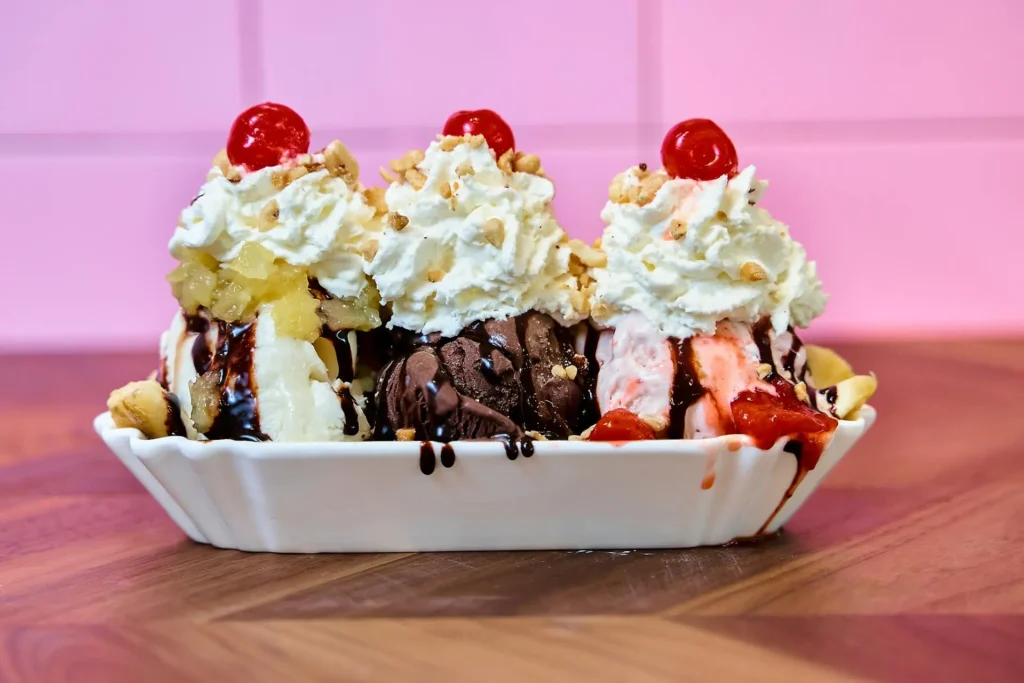
Serving and Pairing Gelato
Elevating Your Gelato Experience
Gelato isn’t just a treat—it’s an experience. Whether you’re serving it up in a classic cone or pairing it with your favorite dessert, there are countless ways to enhance its rich, creamy goodness. Let’s explore some creative ideas to serve and pair gelato that will impress your guests and delight your taste buds.
Creative Ways to Serve Gelato
Cones and Cups: There’s something undeniably fun about gelato in a cone, but for a more elegant presentation, serve it in small, chilled bowls or cups.
Gelato with Espresso (Affogato): For a truly Italian experience, serve a scoop of vanilla or hazelnut gelato “drowned” in a shot of hot espresso. This combination is known as affogato, and it’s both a dessert and a coffee treat in one.
Gelato Bars: Set up a gelato bar with various toppings like chopped nuts, chocolate shavings, and fruit syrups. Let guests customize their gelato bowl—an instant hit at any gathering.
Pairing Gelato with Desserts and Beverages
With Pastries: Pairing gelato with pastries such as croissants or chocolate lava cake can create a delightful contrast in textures and flavors.
Beverage Pairings: A light, fruity gelato goes wonderfully with sparkling wines, while richer flavors like chocolate pair well with darker, robust wines or a stout beer.
Seasonal Flavors: Match the gelato flavors with the season—pumpkin spice in the fall, peppermint during the winter holidays, or fresh berry flavors in summer.
By exploring these serving suggestions and pairings, you can turn any occasion into a gourmet gelato fest. Ready to get even more creative? In our next chapter, we’ll dive into healthier gelato variations you can enjoy any day!
Healthier Gelato Variations
Indulging Smartly with Gelato
Who says gelato can’t be part of a healthier lifestyle? By tweaking a few ingredients, you can enjoy this delightful treat even if you’re watching your sugar intake or following a dairy-free diet. Let’s explore how to make gelato with low-sugar and dairy-free options, using natural sweeteners and alternative milk.
Creating Low-Sugar and Dairy-Free Gelato
Low Sugar Options: Swap traditional sugar with natural sweeteners like stevia, erythritol, or monk fruit sweeteners. These alternatives allow you to enjoy the sweet taste of gelato without the spike in blood sugar.
Dairy-Free Alternatives: Coconut milk, almond milk, and oat milk are fantastic substitutes for traditional dairy. They offer a creamy texture similar to regular gelato while catering to those with lactose intolerance or dairy allergies.
Using Natural Sweeteners and Alternative Milks
Experiment with Sweeteners: Each natural sweetener has its unique flavor profile. Stevia tends to be sweeter than sugar, so you might use less, while erythritol has a cooling effect that can enhance the coldness of gelato.
Choose Your Milk: Coconut milk is rich and creamy, making it perfect for mimicking the texture of traditional gelato. Almond milk is lighter, which works well for fruit-flavored gelato, and oat milk offers a mild taste and creamy consistency that’s excellent for nutty or chocolate flavors.
By incorporating these healthier alternatives, you can whip up gelato that not only satisfies your cravings but also aligns with your dietary preferences. Next, we’ll look at the art of gelato presentation to make your treats not only taste good but look stunning too.
The Art of Gelato Presentation
Turning Scoops into Masterpieces
Presenting gelato isn’t just about serving a dessert; it’s about creating an experience that delights the eyes as much as the taste buds. Let’s learn the art of scooping and decorating gelato to elevate your dessert presentations to the level of culinary artwork.
Techniques for Scooping and Presenting Gelato
Perfect the Scoop: Always use a gelato scoop rinsed in warm water to glide through the gelato effortlessly. Aim for smooth, rounded scoops that make your servings look generous and inviting.
Temperature Matters: Let the gelato sit out for a few minutes before scooping. This makes it easier to achieve beautiful scoops without the gelato being too hard or too soft.
Decorative Ideas for Gelato
Edible Garnishes: Top your gelato scoops with fresh fruits, mint leaves, or even edible flowers for a touch of elegance. These natural elements not only add color but also enhance the flavor profile of your gelato.
Sauce Drizzles: A drizzle of chocolate, caramel, or fruit sauce can instantly boost the visual appeal of your gelato. Use a spoon or a squeeze bottle for precision and create zigzag patterns or concentric circles.
Creative Containers: Serve gelato in unexpected items like hollowed-out fruit bowls, waffle cones, or elegant martini glasses. Each choice adds a unique twist that can complement the flavor of the gelato.
By mastering these presentation techniques, you transform simple gelato servings into eye-catching delicacies. As you scoop and garnish, remember that each bowl of gelato is a blank canvas for your creativity. Enjoy making your culinary creations as much as your guests will enjoy eating them.
Conclusion
Making homemade gelato has been a delightful journey from creamy scoops to vibrant flavors. I’ve loved experimenting with classic and quirky recipes, each batch bringing its little surprise. Sharing these creations has turned many gatherings into sweet celebrations. I encourage you to dive into your gelato adventures; it’s a rewarding craft that brings joy and a touch of artisanal flair to any table. Who knows? Your next gelato flavor might just become a family favorite.